The Problem
Smartphones are so smart that sometimes their smartness becomes a hassle. Have you ever seen your iPhone auto-joining a Wi-Fi network you do not want to use?
The problem is once you’ve connected to a Wi-Fi network, your iPhone will remember it and automatically connect to it again when you are within the network’s range. This happens even if the Wi-Fi network has a slow internet connection, slower than your cellular data, or does not have any connection at all.
If you prefer to only join a certain Wi-Fi network manually, say your Wi-Fi at work, or if you would like to have your iPhone always choose one Wi-Fi network over another, you can easily do it.
The Solution
I’ll be using my Wi-Fi setup at home as an example.
I have two routers at home and each router has its own Wi-Fi network, one called AirPort Express and the other NETGEARFreeWiFi. Each Wi-Fi network also has a 2.4 GHz band and a 5 GHz band.
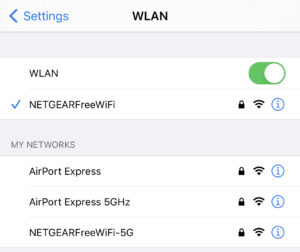
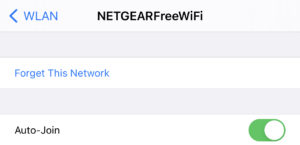
Because I use the NETGEARFreeWiFi most of the time, I have Auto-Join enabled for this network and disable for other networks.
To enable or disable Auto-Join on a Wi-Fi network, go to Settings, then WLAN, tap the Info button (blue i in a circle), and then toggle Auto-Join on or off.
With Auto-Join on for NETGEARFreeWiFi, my iPhone is still able to discover all my networks but it will only join NETGEARFreeWiFi automatically.
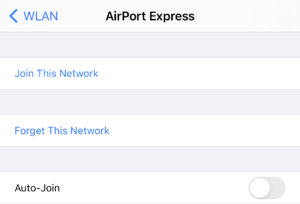
Now imagine you would like for your iPhone to always stay on the cellular connection when you are at work because the office Wi-Fi connection is never good. You can easily do this too by turning Auto-Join off for your office Wi-Fi.
Did you find today’s post helpful? Let us know in the comments! Interested in learning more iPhone tips and tricks? Check out this collection here.
