Need to scan a document but your tiny home office only has a printer that does not have a scanner built-in? Worry not because your iPhone’s Notes app can do just that trick.
The Notes app also allows you to sign the document, but since you are printing the thing, might as well just give it the good old wet-signature too.
Once you have printed and signed the document, place it on a flat surface. Apple does not say this in their tutorial, but you need to place the document where it’s easy for your iPhone’s camera to capture, preferably on a flat surface.
Follow these steps to scan documents with your iPhone’s Notes app.
- On your iPhone, launch the Notes app. If you are having trouble finding it, just pull down anywhere (not the top) on any of your Home Screens and type in “notes”.
- Select a note or tap the Compose button on the bottom right corner (
 ) to create a new note.
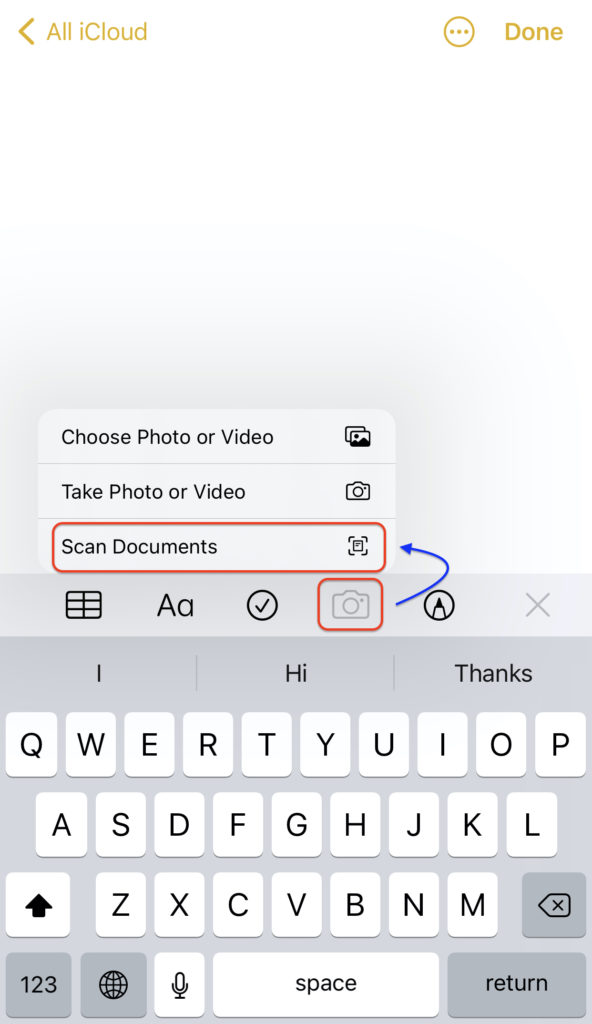
 - Your keyboard should slide up from the bottom. Tap the Camera button above the keyboard () and then tap Scan Documents ().
- Point your camera at the document that you had placed on the flat surface. By default, your device is in Auto mode – see the top right corner of the screen. The Notes app will scan automatically. If necessary, tap on Auto to switch to Manual mode and drag the corners to adjust the scan to fit the page, then tap Keep Scan. If you have multiple pages to scan, just place them in your camera’s view page by page. The Notes app will be able to turn them into a multiple-page PDF file.
- Once you have scanned all the pages, tap Save on the bottom right. You’ll get a PDF file. From there you can simply tap the file and you’ll see the Share button on the top right corner of the screen.