Whether you just got a new Mac or have been using one for a while, you’ll want to change these 4 settings.
1. Show your hard disk on your desktop

Steve Jobs had a line that’s deeply embedded in Apple’s attitude towards the file management system on their devices. The famous line goes like this: “there is an app for that”. Apple does not want you to worry about your file management system. They want all your files managed by apps, preferably apps they developed.
By default, your Mac does not have its hard disk icon show up on the desktop. On your iPhone and iPad, you do have the Files app but do you even remember the last time you opened it? You might think the iPad must be a good place for a full blown file management system. Well no. Not according to Apple. The iPad was first released in 2010, but it’s not until later this year in 2019 with the release of iPadOS that the iPad will finally be able to properly read a USB drive.
Bottom line is, people do want to interact with their file management system on a device like the Mac, and having the hard disk icon show up on the desktop is a good start. Luckily Apple does give their users this choice.
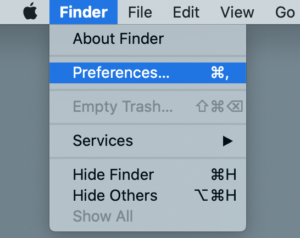
To see your hard disk on your desktop, go to Find Preferences and select “Hard disks” under “Show these items on the desktop”.


Want to also see how much free space you have on your hard disk? Tap or click on your desktop with two fingers and select “Show View Options”, and then make sure the “Show Item Info” option is selected.

2. Tap to click on your trackpad
When you set up your new Mac for the first time, you need to click on the trackpad for an action to register. Wouldn’t it be nice to be able to tap on the trackpad to achieve the same goal? Well you can.
Go to System Preferences, and then Trackpad, under the Point & Click tab, make sure “Tap to click” is selected.

3. Three finger drag
Dragging a windows around on your screen with three fingers is just the natural thing to do, so natural it makes you wonder why Apple did not enable it by default. Not only did Apple not enable the option by default, they buried it deep in Accessibility settings.
To enable dragging with three fingers, go to System Preferences, then Accessibility. Scroll down to Pointer Control. Under Mouse & Trackpad, tap on “Trackpad Options” and make sure the “Enable dragging” option is checked with “three finger drag” selected.

4. Double click/tap on title bar to minimize a window
Now this one is a personal favorite of ours so it’s a goodie.
Just in case you were wondering what the title bar is –

By default when you double click or tap on a window’s title bar, the windows zooms in or out, but it just so happens when we double tap the title bar, we want the window to go away (minimize). Fortunately, this is also an option Apple allows.
Go to System Preferences, and then Dock. Make sure “Double-click a window’s title bar to minimize” is selected, and while we are at it, let’s also select “Genie effect” for when we minimize windows. The “Scale effect” is no fun, trust us.

What do you think of these tips we have shared? Do you find them helpful? Got tips and tricks you want to share with us? Feel free to leave a comment.


